

Introduction
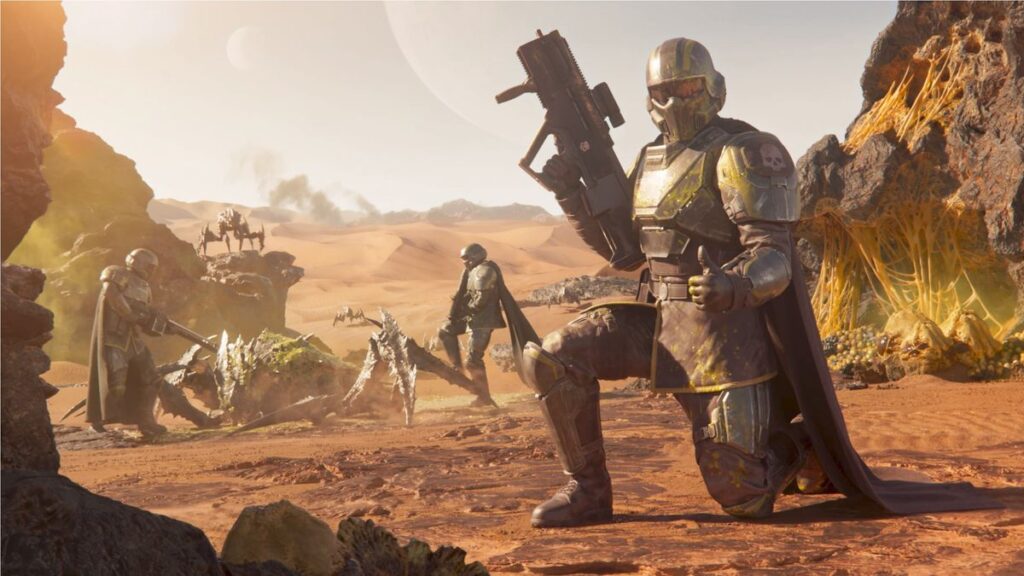
Helldivers 2, the state-of-the-art installment in Arrowhead Game Studios’ sci-fi tactical shooter series, gives an extreme co-op experience in which teamwork and strategy are key. The Helldivers intend to defend “Super Earth” from alien invasions and eliminate hostile forces throughout distinct worlds. To obtain this, gamers have access to diverse stratagems—critical tactical tools that allow them to call in the guide, from ammo drops and heavy guns to protecting turrets and recuperation kits. Choosing the right stratagems can make all the difference, especially as missions become harder and enemies greater relentless.
In this guide, we’ll break down a number of the quality stratagems in Helldivers 2, supplying insights on whilst to install every one for maximum efficiency. Whether you’re a recruit or a pro veteran, those stratagems will help you and your squad thrive in even the cruelest environments.
Understanding Stratagems in Helldivers 2
Stratagems are guide gear that Helldivers can install on the battlefield by calling them in from orbit. Each participant has a limited quantity of stratagem slots, so selecting wisely is crucial. Stratagems can offer something from effective guns to shielding shields, and knowing how to use them in unique eventualities can mean the difference between existence and loss of life.
Successful missions regularly depend upon expertise in each stratagem’s strengths and boundaries. Balancing offensive, protective, and support stratagems ensures your group is properly prepared to address an extensive variety of threats.
1. Resupply Pack: Keeping the Ammo Flowing
The Resupply Pack is one of the most reliable and essential stratagems in Helldivers 2. Running out of ammo inside the middle of a venture can be disastrous, in particular, whilst waves of enemies are closing in from all aspects. This stratagem lets in you to call in a drop that resupplies your team’s ammunition, making sure you can hold preventing without interruptions.
When to Use:
Mid-challenge while your squad is low on ammo.
Before entering excessive-intensity combat zones.
For prolonged missions with minimum resupply opportunities.
The Resupply Pack won’t be the flashiest stratagem, however it’s the spine of assignment fulfillment. By retaining everyone’s guns loaded, you hold your squad’s firepower.
2. AT-47 Anti-Tank Emplacement: High-Damage Defense
The AT-47 Anti-Tank Emplacement is a heavy weapon stratagem designed to counter heavily armored enemies. When deployed, it creates a powerful desk-bound turret capable of dealing huge harm. Although it isn’t always cellular, its energy is invaluable for protecting unique locations or taking down large enemy devices.
When to Use:
Against bosses or closely armored enemies.
When protecting factors or goals.
As a final stand choice when surrounded with the aid of stronger foes.
While the AT-47 is slow and calls for setup time, it can drastically bolster your defensive skills. Place it strategically to cover your flanks or get rid of high-chance goals from a secure distance.
3. MG-94 Machine Gun Turret: Reliable Area Defense
The MG-ninety-four is a flexible machine gun turret that gives dependable location coverage, presenting non-stop hearth in opposition to incoming waves of enemies. It’s perfect for defending objectives, chokepoints, or slender passages, wherein the turret can cut down enemies before they reach your group.
When to Use:
For defending fixed positions.
In missions with excessive enemy counts.
To cover your return while advancing through open terrain.
The MG-ninety-four is a super crowd-manipulate choice, maintaining lighter enemies at bay. However, it’s prone to heavy enemies, so pairing it with anti-tank guns or putting it strategically could make it even more powerful.
4. EAT-17 Anti-Tank Launcher: Mobile Firepower
The EAT-17 Anti-Tank Launcher offers powerful cellular anti-armor talents. This rocket launcher is good for handling heavy objectives that require greater punch than preferred firearms. Unlike the desk-bound AT-forty seven, this launcher lets in Helldivers stay at the circulate, which can be vital for immediate-paced missions.
When to Use:
In encounters with heavily armored enemies.
For short takedowns of larger threats.
When maneuvering between cover or all through hit-and-run tactics.
The EAT-17’s versatility and electricity make it a critical tool for squadrons going through high-threat environments. Keep it reachable for sudden encounters with armored enemies or bosses.
5. Thunderer Barrage: Clearing the Battlefield
The Thunderer Barrage calls in a heavy artillery strike that rains down powerful explosives over a wide place. It’s a devastating offensive stratagem ideal for clearing out massive businesses of enemies or softening up fortified defenses before advancing.
When to Use:
Against huge enemy clusters.
When dealing with protecting emplacements.
As an opening strike to reduce enemy numbers.
Timing is the whole lot with the Thunderer Barrage. Use it to clear open areas or melt enemy forces, however, take into account of the friendly fireplace. This stratagem has large damage capability however requires cautious aim and timing to avoid harming teammates.
6. Proximity Mines: Securing Your Position
Proximity mines offer fantastic shielding assist for areas in which your squad expects enemy waves. These mines explode whilst enemies method, making them best for shielding flanks, bottlenecks, or key mission objectives. They’re a powerful way to manipulate enemy movement, giving your crew respiration room to reload or heal.
When to Use:
To control enemy movement near targets.
During defense-orientated missions.
For retreat scenarios, masking your squad’s escape.
While they don’t deal as a whole lot harm as some different options, proximity mines are a useful device for crowd manipulation. Their passive protection allows you to attention on other obligations even as retaining positive regions covered.
7. Support Pack: Aiding Health and Revives
The Support Pack stratagem gives essential fitness and revival benefits to hold your squad operational. Missions can speedy flip dire without recuperation options, specifically whilst dealing with waves of powerful enemies. The Support Pack ensures that wounded allies can heal and return to action hastily.
When to Use:
During prolonged missions wherein healing alternatives are scarce.
In battles with frequent injuries or squad wipe risks.
For reviving teammates in challenging regions.
This stratagem is priceless whilst your group’s health starts offevolved to run low. With its brief recovery and revival abilities, the Support Pack may be a lifesaver in high-stakes missions.
8. Heavy Armor Exosuit: Ultimate Protection
The Heavy Armor Exosuit is one of the most effective protecting stratagems in Helldivers 2. This match complements a player’s sturdiness and damage resistance, permitting them to withstand assaults that would normally be fatal. While wearing the exosuit, a Helldiver can attention on dealing harm with out worrying approximately regular evasion.
When to Use:
Against overwhelming enemy numbers.
In frontline fight roles.
For solo play or while acting as a team tank.
The Heavy Armor Exosuit offers unrivaled protection, however it additionally reduces mobility. This stratagem suits gamers who decide upon a high-damage, high-defense function and may tackle a couple of enemies right away.
Conclusion:
In Helldivers 2, expertise in the position of every stratagem can significantly enhance your squad’s probabilities of survival and victory. While a few stratagems provide powerful offensive help, others provide essential defensive alternatives or important assets. The key to the usage of stratagems efficiently lies in adapting them for your squad’s composition and assignment targets. The proper mixture of resupply packs, anti-tank emplacements, healing kits, and crowd-manage weapons will ensure that your crew is ready for any chance.
As you progress via Helldivers 2, test with extraordinary stratagems to see which of them works best on your playstyle and your crew’s needs. With the proper mix of offensive and defensive alternatives, you’ll be prepared to tackle even the toughest missions and emerge successful towards any alien risk.